
Do you ever look at other people’s photos and wonder how they got their background to look blurry (also known as “bokeh“) while their subject is perfectly in focus?
For the sake of this post I am going to assume you said “Yes!” If you did not then feel free to move along 🙂 Ok, now grab your camera and let’s start learning…
I remember getting my first DSLR camera and looking at that little dial on the top of the camera with letters and pictures that made no sense to me at all. I vaguely knew what the photos meant (guy running was for sports, the face was for portraits and the mountain was for landscapes) but the letters on the other side of the dial might as well have been a foreign language. I put that bad boy on Auto and started shooting away, only to get frustrated when my pictures didn’t turn out the way I had hoped. I pulled out the manual (always a good plan) and starting reading. I slowly started to figure out each letter one at a time.
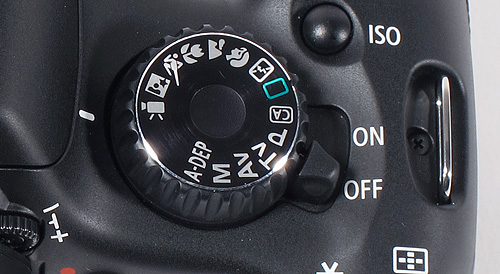
For the sake of this post I want you to set your camera to the “Av” mode for Canon and “A” mode for Nikon. This is the Aperture Priority Mode, which means that it will do part of the thinking for you….but not all of it! In this setting your shutter speed will be determined for you while you choose your ISO and Aperture – I will walk you through each of these as we go.
ISO is how much light your camera takes in to expose for your image. If you are outside on a sunny day you won’t need a whole lot of light going in because the light you have is bright. For this setting you would need an ISO of around 100. If you are outside in the shade or it cloudy then a good ISO would be around 400. Inside with natural window light or bright inside lights would call for an ISO around 800 and low light situations would need an ISO of 1600 or higher. Your maximum ISO capabilities will depend on the type of camera you have.
Your aperture is the key to getting that beautiful, creamy “bokeh” blur that you want. The aperture is how wide or narrow the opening in your lens is. This is where it gets a little confusing so just bear with me….the lower the number (ex: f/1.8) the wider the opening and the higher the number (ex: f/16) the smaller the opening. This also make a difference in how much light you are letting into your camera, as well as how wide your focal plane is. Here is an example of my setting for an image where I wanted the background to be very blurry. (Minnie Mouse was a much more willing model than my daughter so that is who I went with for this one)
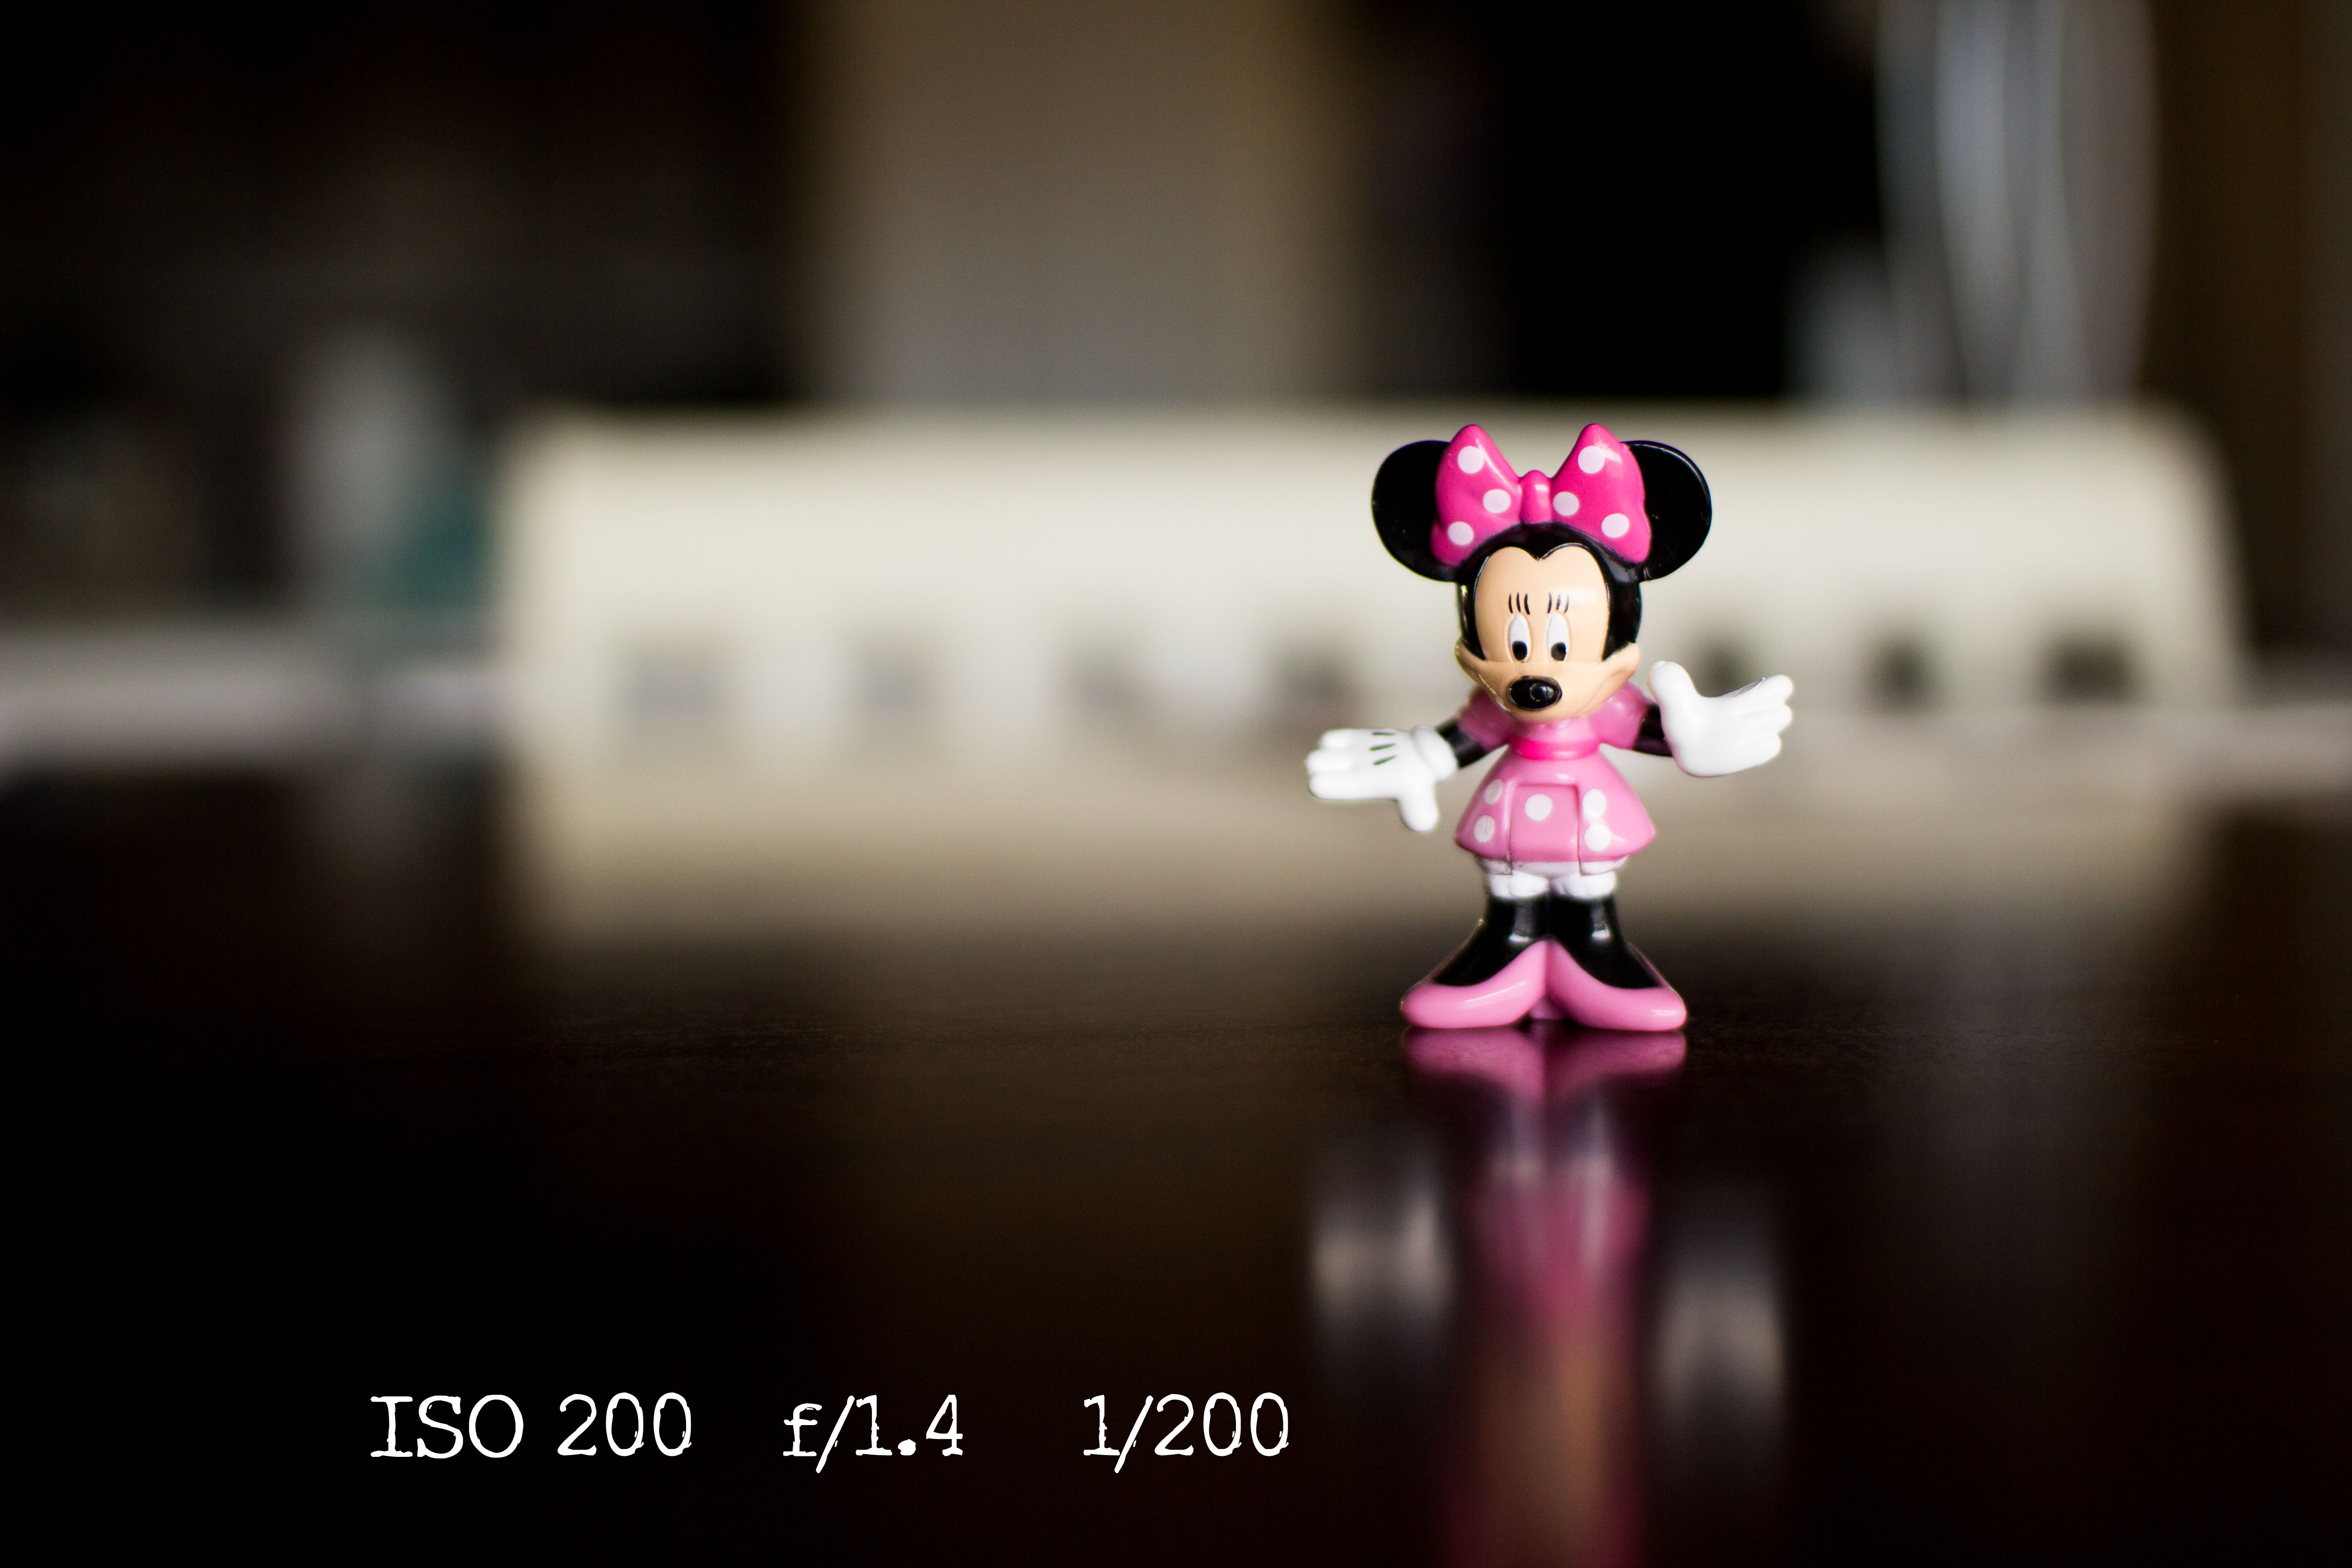
The number on the left is my ISO, the middle is my aperture, and the right is my shutter speed. Notice that my aperture is very low since I was shooting with a 30mm prime lens that allows me to go this low. Your kit lens will most likely not go below f/4.0 which is fine. If you are looking for a good prime lens to start with that will let you drop your aperture even lower I would suggest a 50mm 1.8 like this one from Adorama.
If you look closely at the image above you will see that Minnie’s face is in focus, but not much else. That is because my aperture was so low that my focal plane was very small. Think of a focal plane like two pieces of glass. The only areas of your image that will be in focus are those that fall between those two pieces of glass. The smaller your aperture number the thinner the space between the two pieces of glass, which creates the blurry background. The larger your aperture number the more room you have between your pieces of glass and the larger the portion of your image that will be in focus.
Is your head completely spinning yet?
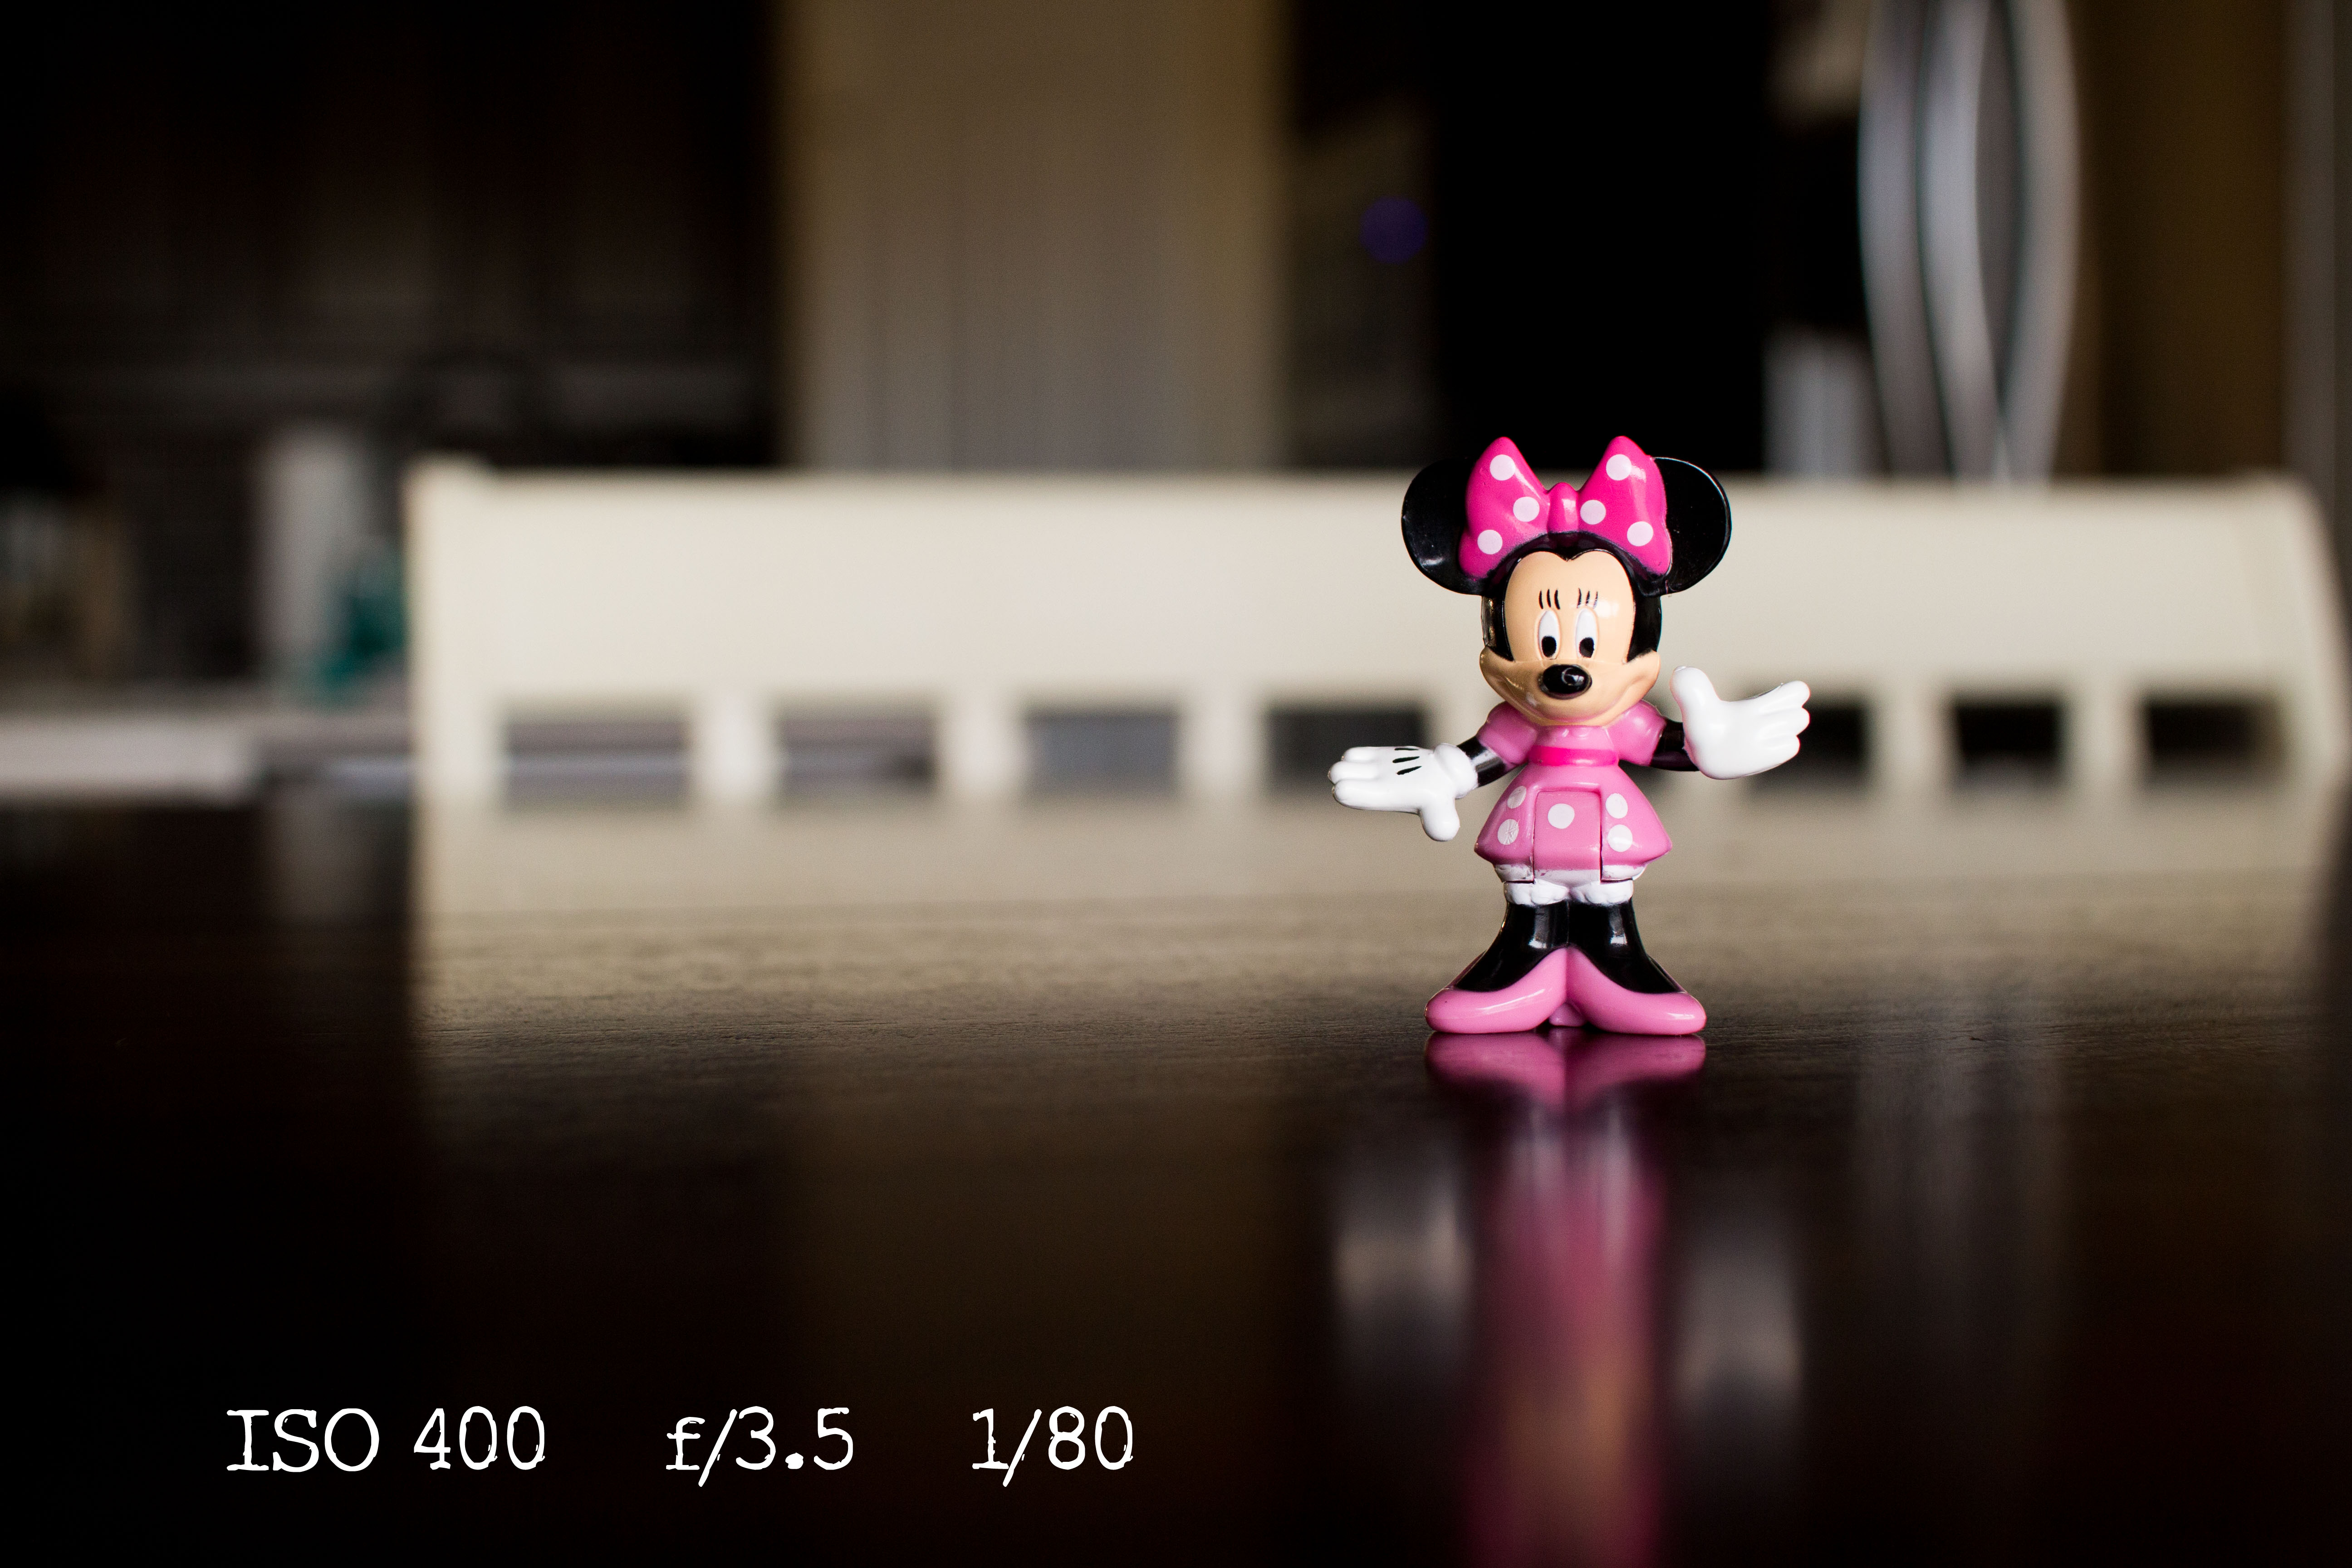 In the image above I took the exact same photo, only I increased my aperture and ISO which resulted in a lower shutter speed. Notice that more of Minnie is in focus but the background is still blurry. You should also note that my shutter speed decreased from 1/200 to 1/80. Since my subject isn’t moving 1/80 is ok, but if I was working with a moving subject I would want it to be at least 1/100 to avoid motion blur. Since my aperture was bumped up to f/3.5 there was less light getting into my camera so I had to increase my ISO to compensate for that. All three things (ISO, aperture & shutter speed) working together is known as the Exposure Triangle.
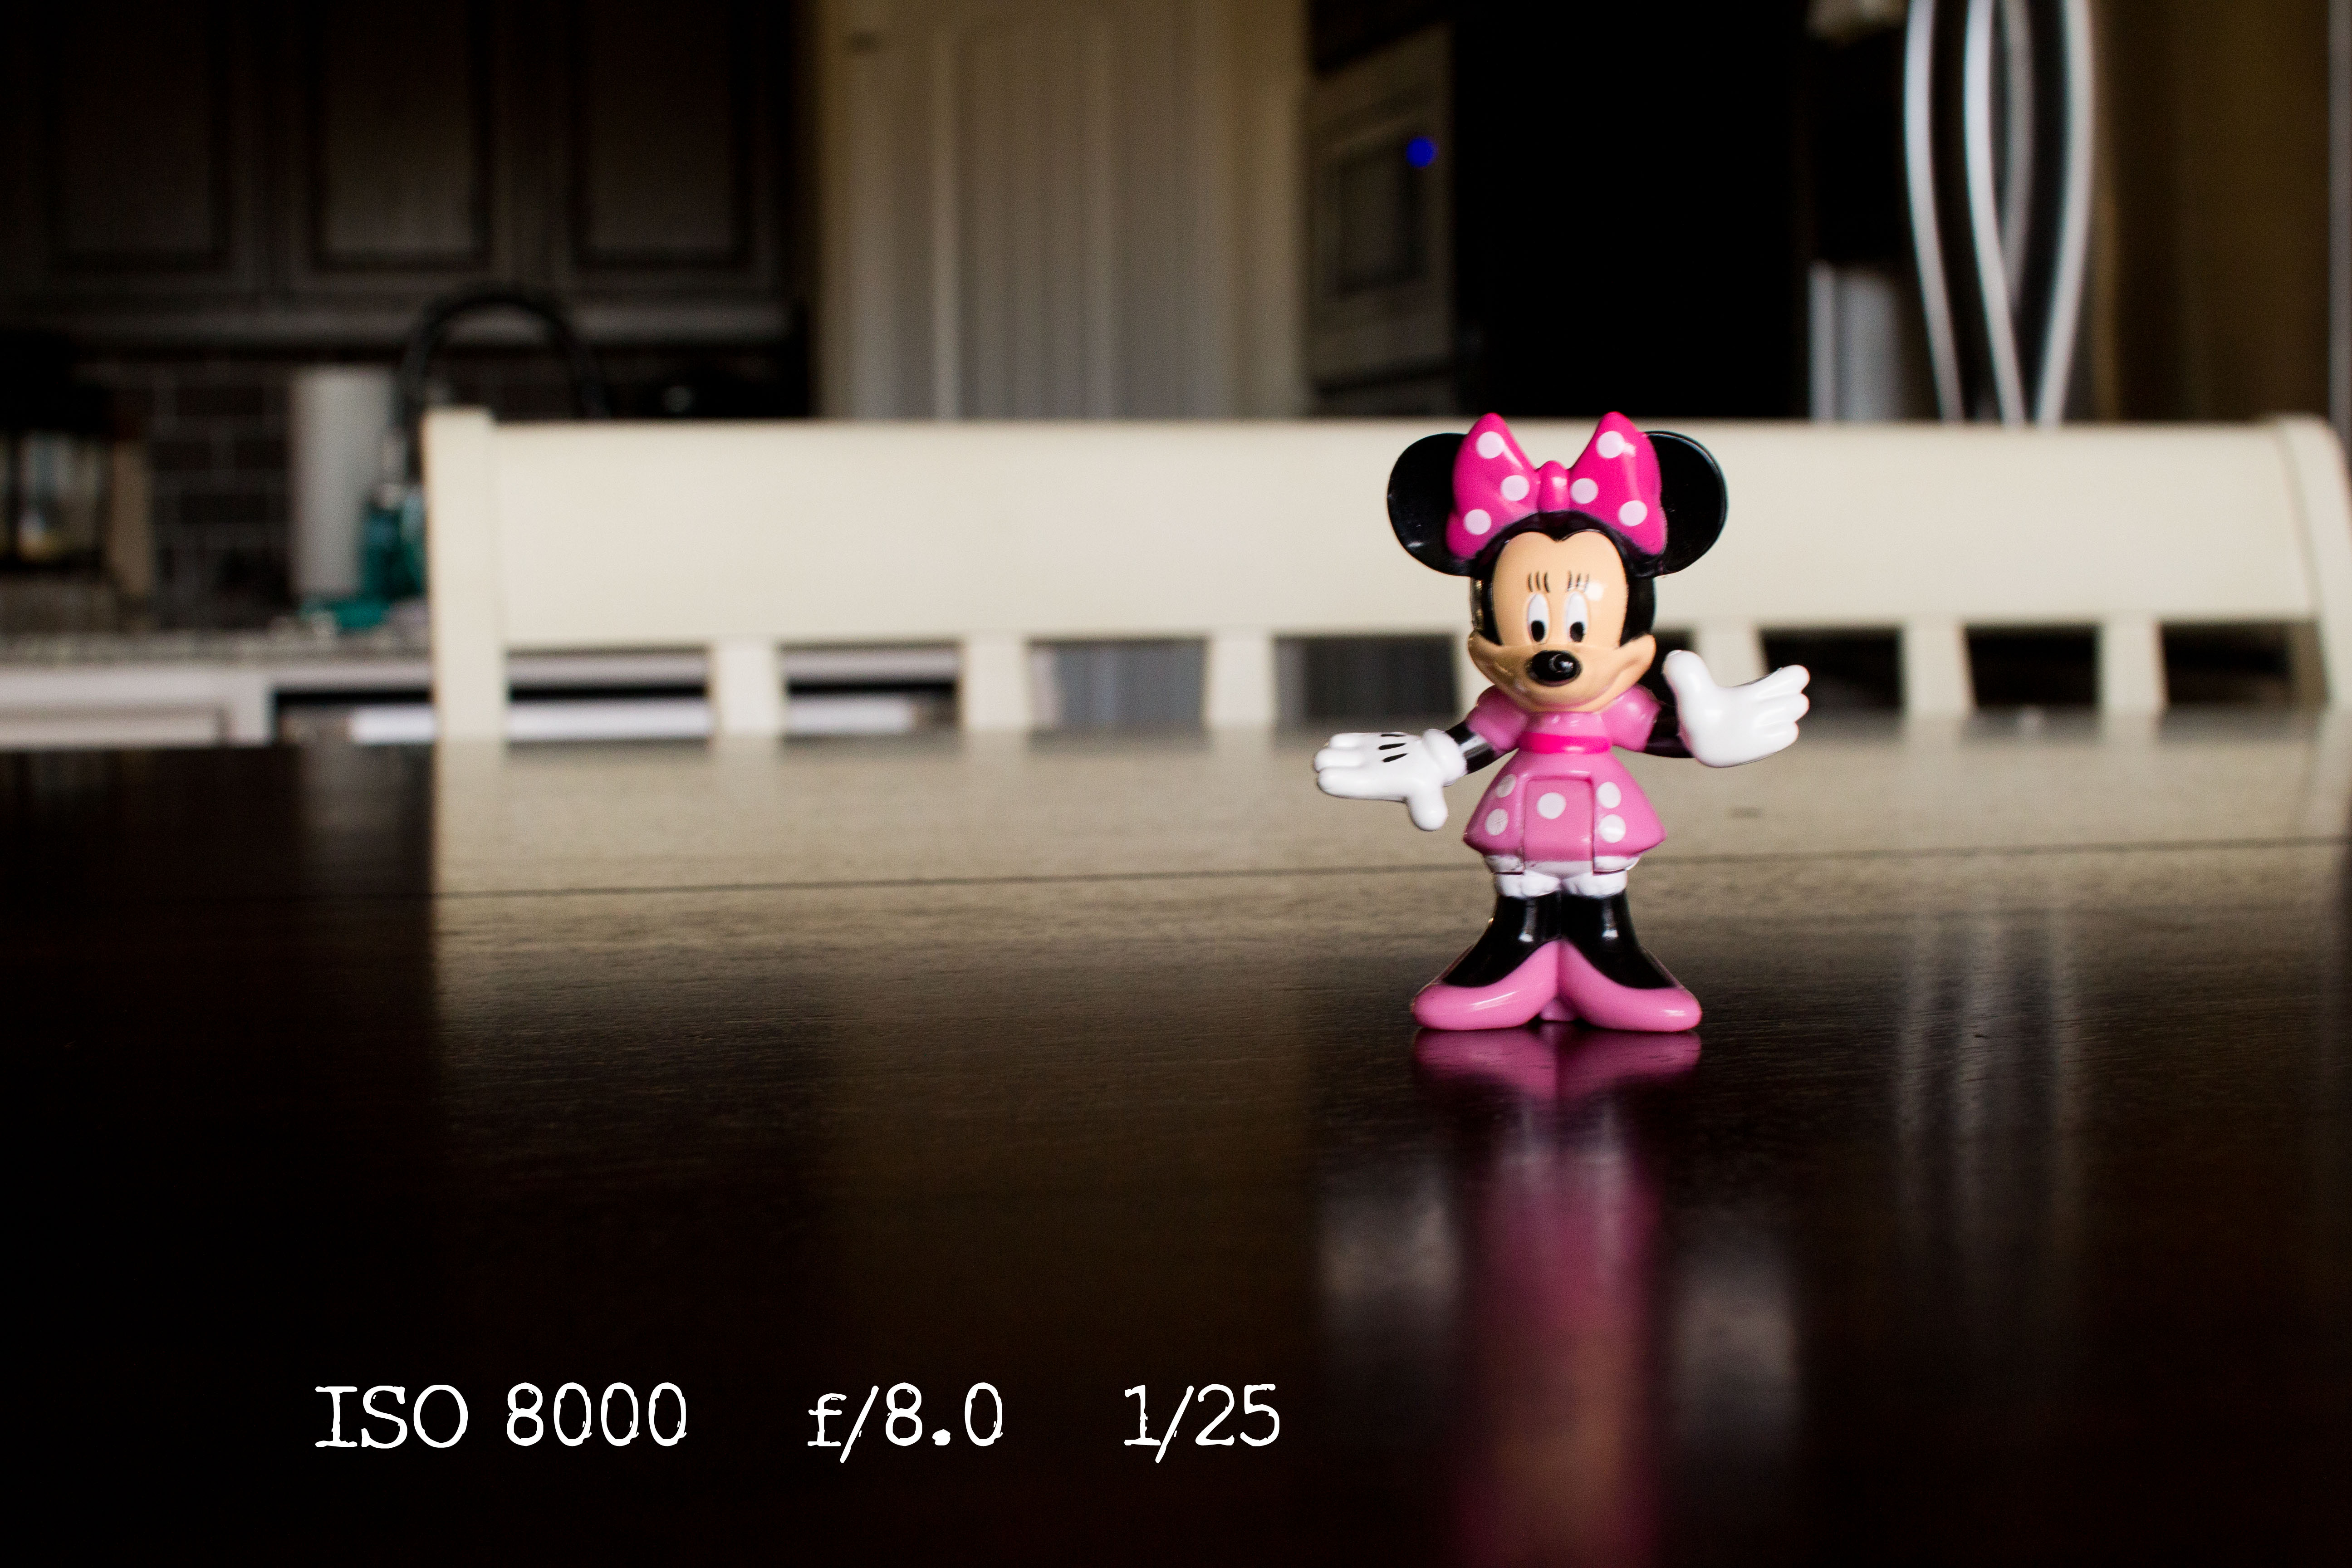 As my aperture keeps increasing so does the amount of my image that comes into focus. I am also having to increase my ISO in order to keep enough light to properly expose my subject (Minnie). My shutter speed was much slower than I would normally have it, but I was able to brace my camera on the table to avoid camera shake which can make an image blurry…in a not so good way!
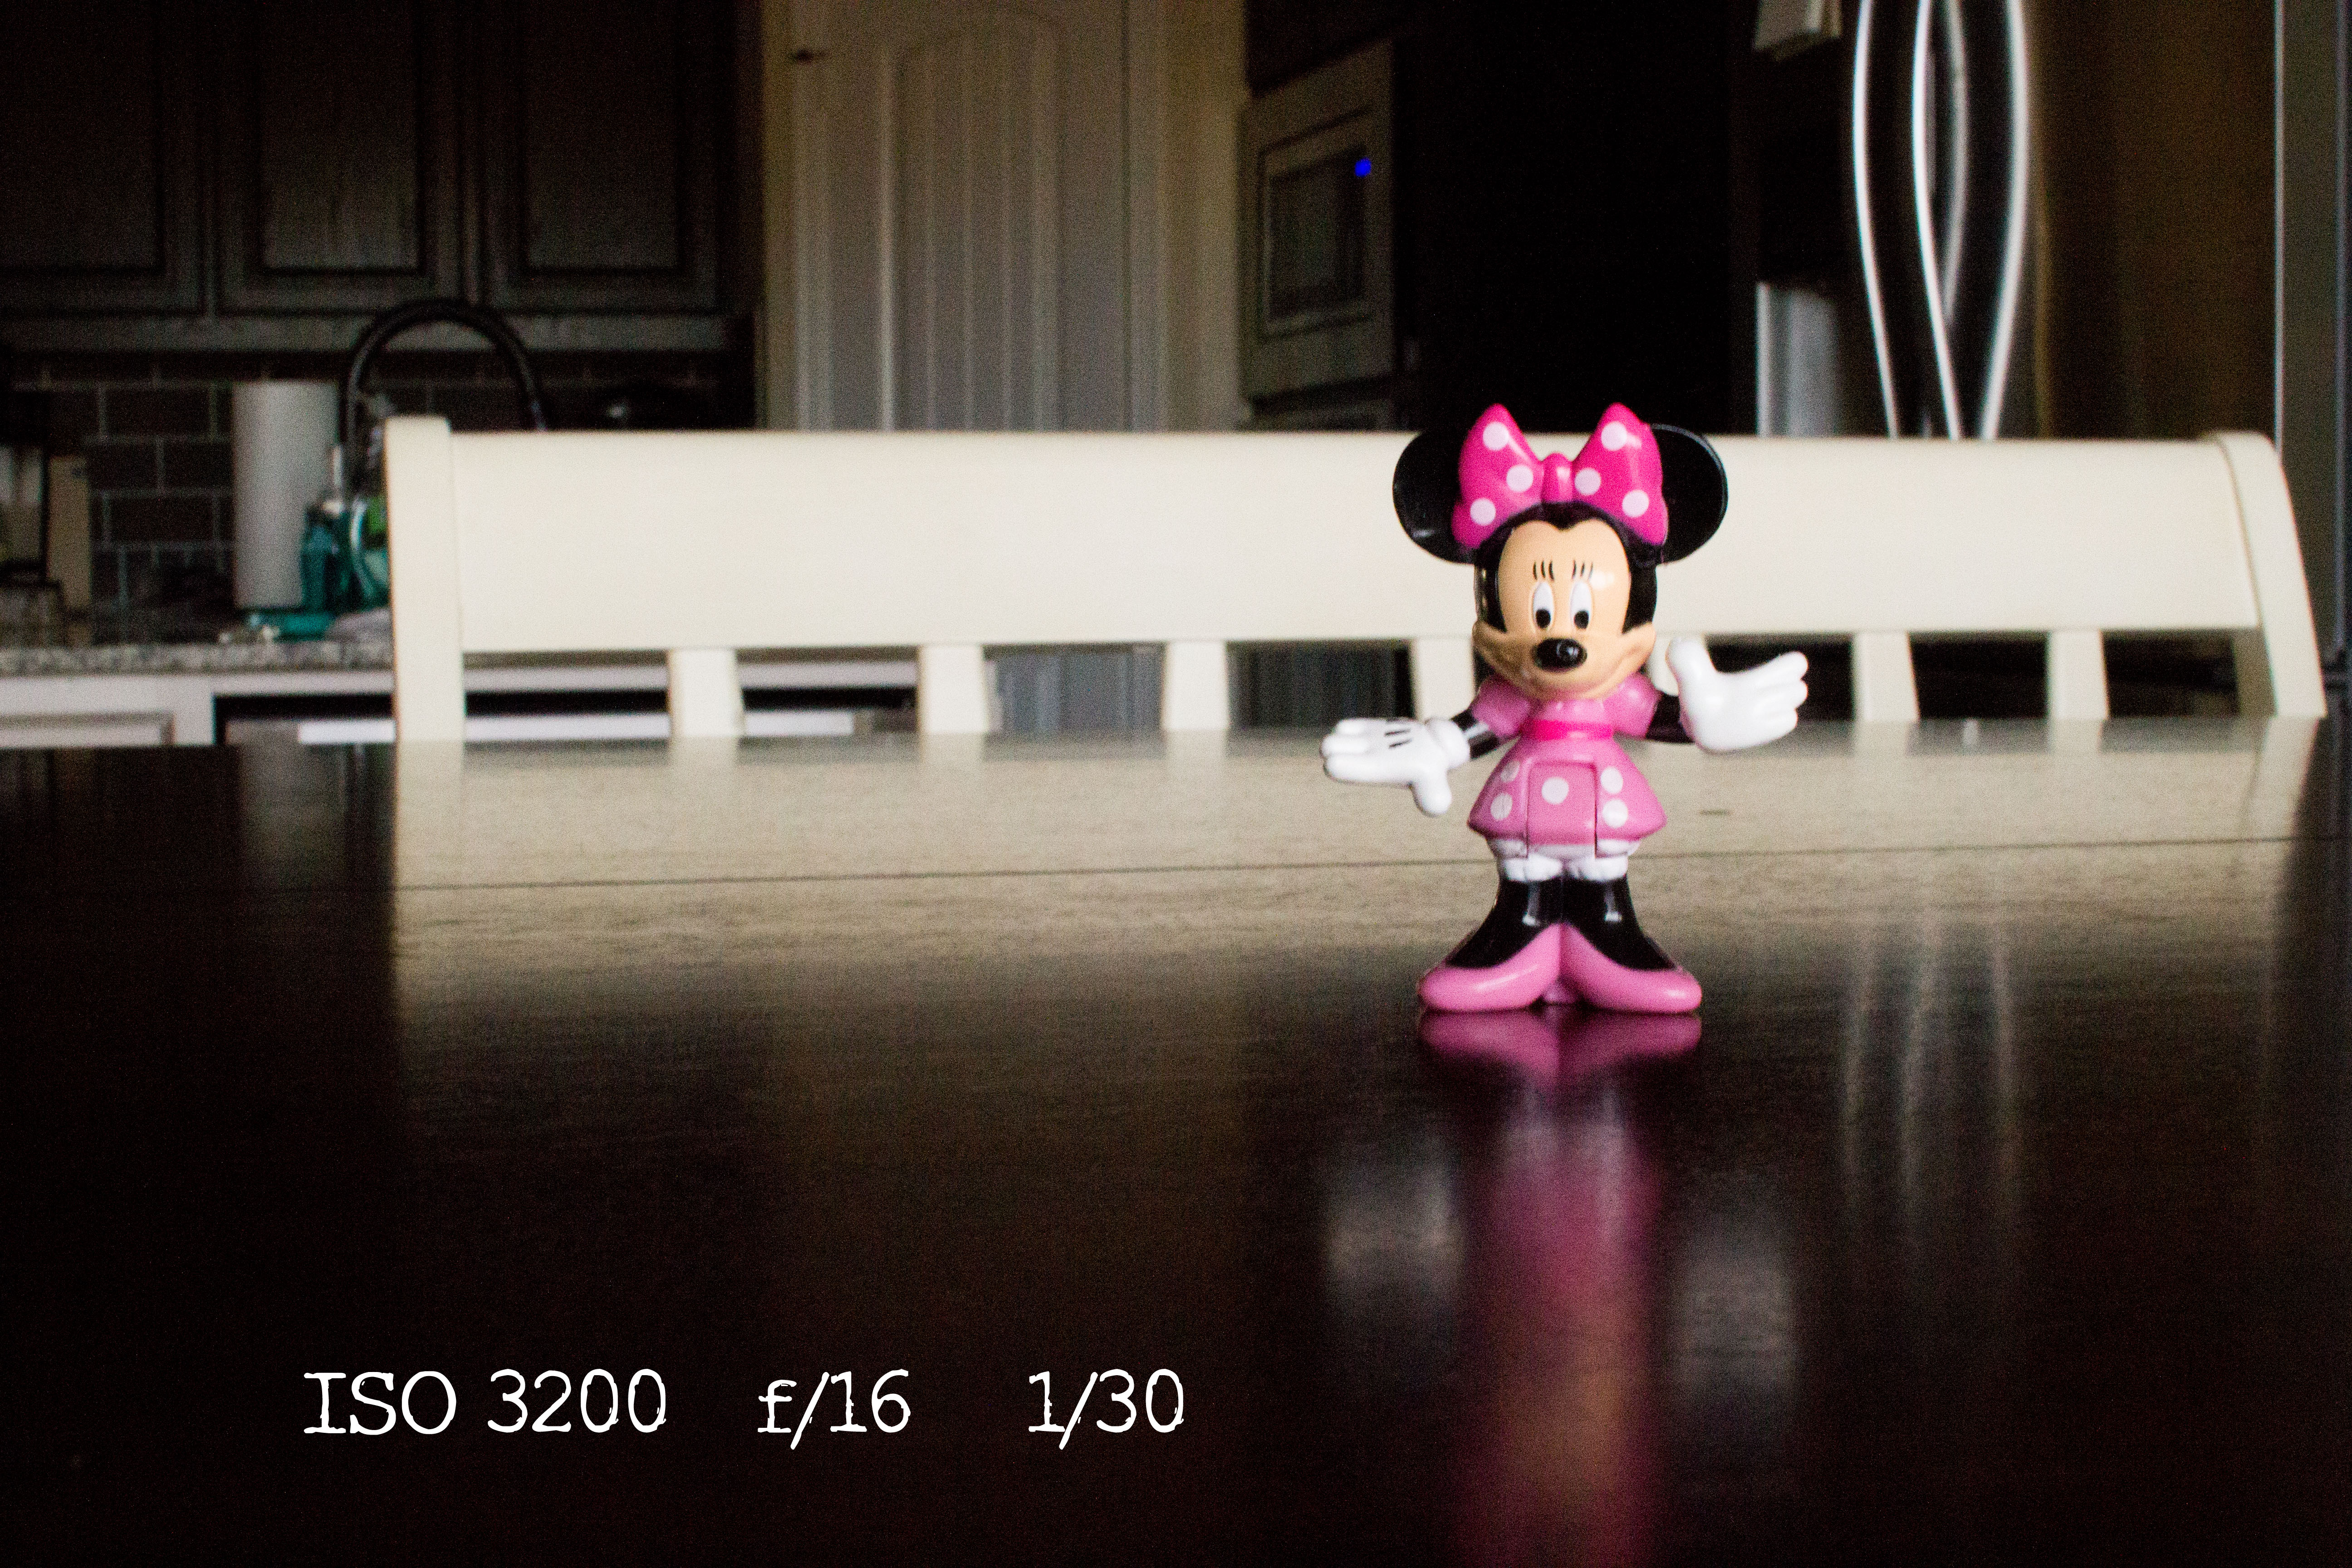
In my last example, you can see that almost every part of my image is in focus…even my messy kitchen island. 🙂 My settings are a little misleading here because my ISO and shutter speed are both “better” than they were in the previous image. The reason for that is simple….the sun came out between images. I was shooting with a large picture window behind me and it was a semi cloudy day. From one image to the next, the sun started peeking out so there was more natural light for the camera to let in. This resulted in a lower ISO and faster shutter speed.
So how are you doing? It everything about as clear as mud? I remember feeling very overwhelmed by all of this when I was first learning, and it took reading the same articles over and over again, getting out my camera and playing around and asking A LOT of questions for it all to click. Feel free to ask my anything! I also encourage you to share some of your own images and settings so we can all learn from each other. I might even feature you in a future blog post! 🙂
I love combining my two passions – photography and teaching – and plan to start offering a few small “mom-tography” classes in 2015. In the meantime, leave a comment below and let me know what you want to learn about so I can tailor my blog posts to what YOU want to know!
I would also like to say thank you to my awesome model, Minnie! She did such a great job 🙂

you said: